This is my Generi Rig, in both perspective and side views.
Tuesday, 1 February 2011
Tuesday, 25 January 2011
3D Lamp Animation - Final Room (Textured)
This picture shows the final piece of my animation, with all the textures and objects in place.


Textures - 3D Lamp Animation
In this post I will explain how I created the textures I used within the Lamp Animation, and how I imported them into Maya.
Texture - Wood (Cupboard)
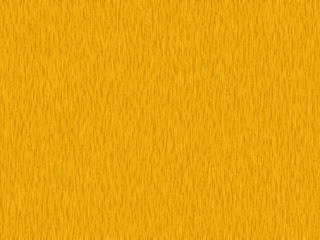
This is the first texture I created. I used photoshop to make this texture, following the steps below:
 1. This is the first step; creating the noise into the brown coloured background.
 2. I then used the motion blur effect, to create a more realistic wood texture.

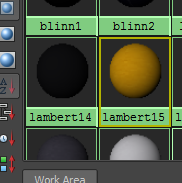
3. I then used the hypershade tool in Maya to use my new texture. This step was used in every texture to add it to my animation.
Once I added my texture into a lambert I then moved the lambert over the cupboard, which formed the wood texture around it.
Texture - Seat

Step 1 - To create the seat texture, I simply added low noise in a blue background in Photoshop. The legs are a simple black background.

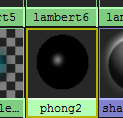 This step shows the phong I used for the seat legs, to make them shiny and different from the rest of the animation.
Texture - Glass
 This is my glass texture I created in photoshop. The steps I took to create this texture are below:

1. The first step was to create a cloud effect on a coloured background. I changed the background colour later on.

2. I then used the plastic wrap effect, with the different properties below.

3. Finally, I used the blur effect on the glass, to make it look more realistic.
Texture - Books

These are some of the book textures I used. I created them all in Photoshop, and included an effect in each one. Above, I used the lens flare effect; top right, I used the blur effect and botton right I used the motion blur effect.
Texture - Wood (Bookshelf, Table)

These textures were created for the bookshelf (left) and the table (right) at the end of the animation. I used the same method as I did in the first wood texture, just used a different colour and direction of noise.
Texture - Wood (Cupboard)

This is the first texture I created. I used photoshop to make this texture, following the steps below:


3. I then used the hypershade tool in Maya to use my new texture. This step was used in every texture to add it to my animation.
Once I added my texture into a lambert I then moved the lambert over the cupboard, which formed the wood texture around it.
Texture - Seat

Step 1 - To create the seat texture, I simply added low noise in a blue background in Photoshop. The legs are a simple black background.
 This step shows the phong I used for the seat legs, to make them shiny and different from the rest of the animation.
Texture - Glass


1. The first step was to create a cloud effect on a coloured background. I changed the background colour later on.

2. I then used the plastic wrap effect, with the different properties below.

3. Finally, I used the blur effect on the glass, to make it look more realistic.
Texture - Books


These are some of the book textures I used. I created them all in Photoshop, and included an effect in each one. Above, I used the lens flare effect; top right, I used the blur effect and botton right I used the motion blur effect.
Texture - Wood (Bookshelf, Table)


These textures were created for the bookshelf (left) and the table (right) at the end of the animation. I used the same method as I did in the first wood texture, just used a different colour and direction of noise.
Saturday, 15 January 2011
Lamp Animation - Final Rendered
This is my final, rendered copy of the Lamp Animation I built in Maya.
Friday, 14 January 2011
Monday, 10 January 2011
Monday, 22 November 2010
3D Lamp Animation

This shows the table that will be used for the bookshelf. I created this by simply creating a cube, resizing it and adding faces on either edge of the cube. I then entered face mode and extruded the 4 faces downwards, to create the legs.

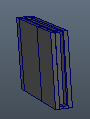
This image shows the bookshelf. I extruded out a big portion of the table, and added 2 faces into the new cube, which I then extruded inwards to create a shelf. I then made a book by simply creating another cube and extruding it to look similar to a book, and duplicated it many times for the busy bookshelf effect.


This image shows the light socket that is used in the animation. Here I have extruded 2 of the 3 faces needed for the socket effect. I then delete the front face, revealling the extruded face.

Subscribe to:
Comments (Atom)